Braids Selber Machen Was Brauche Ich

Beginner-Friendly Guide On How To Do Stitch Braids
Whether you're a hairstylist or just a DIY queen, point braids are something you should definitely try. Dot braids are a type of protective style that is made using the power technique, that is, you continue to add more extension to your natural hair as you braid. To do point braids, you have to section the natural hair into thick or thin horizontal lines, then braid the natural hair with the hair extension. However, you will need to apply hair gel, jam or edge control to the roots to make the natural hair smooth and easier to work with. It depends on a number of factors such as how well you care for your braids and the texture of your hair. For type 3 hair that shrinks less, your point braids should last about 7-8 weeks. It is important to take care of both your natural hair and your braids in point. It is advisable to cleanse your scalp with shampoo once or every two weeks, while you are wearing your braids. Conditioning: To condition your hair, apply the same technique as for the shampooing process, but this time you need to focus on your hair roots. Drying: Finally, let your hair dry and apply light oil to your scalp and roots. Moisturizer: You can also rub some moisturizer on your dot braids to take care of your natural hair shaft. It depends on the length of the point braids you want and also the fullness/thickness of your natural hair. If you want waist-to-butt length for your braids (and you have full hair), you'll need two and a half bundles of hair extensions. If you want a shorter length of braids, a jumbo bundle and a medium bundle of hair extensions are fine. To see how to do dot braids using the rubber band technique, this quick tutorial from ChideLovesYou is helpful. What do you need:Elastics
Any hair hold of your choice (edge control, hair wax, etc.)
hair extensions packs
Step 1: Separate your hair
Start with freshly washed hair. Step 4: Insert Hair Extensions
Now, holding two horizontal sections at a time, insert the extension into your natural hair and braid it into a cornrow. In this video tutorial, Slaying it with Ray will show you how she does the point braids using the comb or finger technique. What do you need
A tail comb
Any hair hold of your choice (edge control, hair wax, etc.)
hair extensions packs
Step 1: Separate your hair
You can start with freshly washed hair. Step 2: Apply hair hold to your hair
Next, apply your hold or edge control to the roots of your hair. Step 3: Sew the braid of your hair
Start by making your first two horizontal parts with a tail comb then braid. Then continue to use a comb or your fingers to make horizontal parts and braid from hairline to ends.
How To Refresh Your Braids: Simple Tips To Make Your Braided Style Last Longer
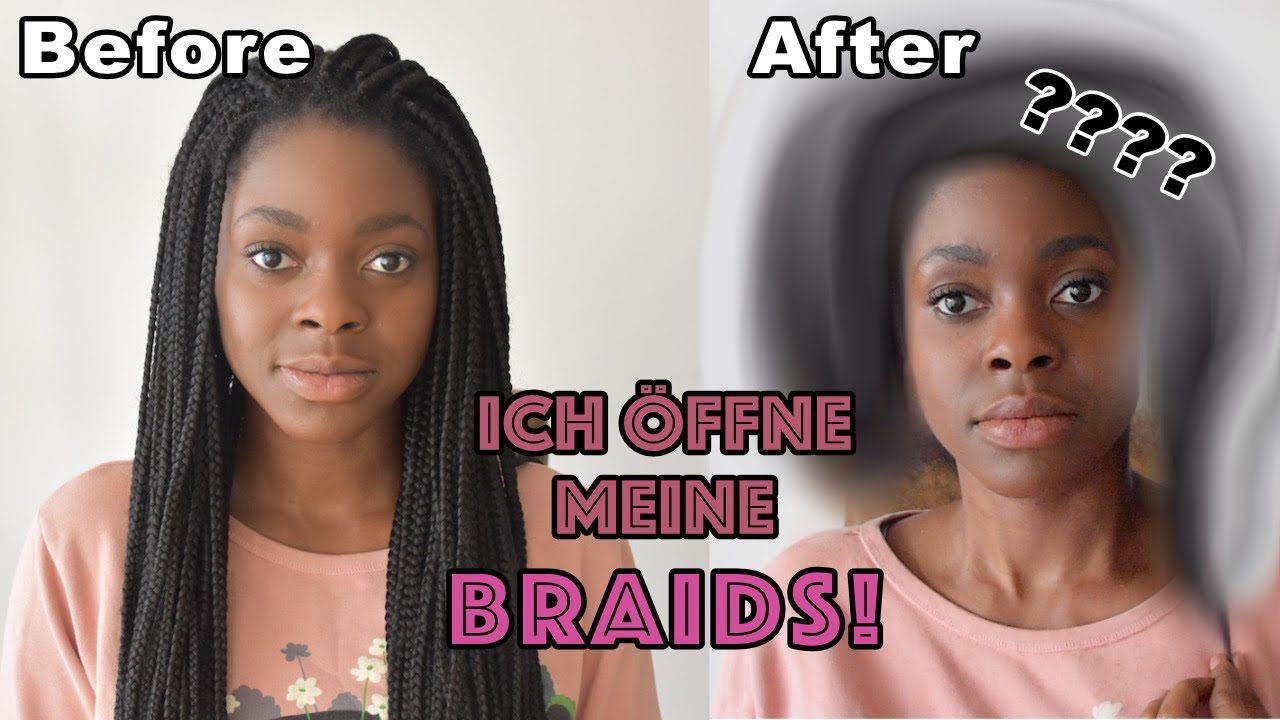
Last summer braids were definitely a big part of my own hair care routine – but as someone whose hair tends to stay on the brittle/dry/other word dry side, protective styling is a must. Armed with a few packs of X-Pression Synthetic Hair Extensions in color 1B (the darkest shade) and a few hours in my barber's salon, I can protect my coils and can't wait to enjoy another twenty minutes. sleep in the morning. If you already have braids, scroll down for our tips on sprucing them up, but if you're lucky enough to live with a braiding expert and are about to try your next braided style, start here.A Step-By-Step Guide To French-Braiding Your Own Hair
I taught myself to do them as a teenager the night before my SATs, partly as a distraction, and partly because I realized they were the perfect hairstyle to successfully pull my hair out of my face and keep them there for many, many hours. Since I'm not a pro, I enlisted the help of hairstylist, braid queen and author of All Hair is Good Hair Annagjid "Kee" Taylor to provide expert advice on learning how to braid your own hair. in French. Like I said, practice makes perfect, and the best part about learning this skill now is that if your braids aren't even showing or are a little bumpy, no one has to see but you. “Clean, dry hair is best when you put it in French braids,” Taylor says. She explains that dry hair allows you to have more control over separate strands when braiding, while wet hair is heavier and more prone to getting mixed up with other pieces, which becomes messy. "It also takes less time to braid dry hair, and your braids will last longer with no visible flakes or frizz," she says. When it comes to using products to prep your hair for French braiding, Taylor tells me that less is more. If you're doing double braids, you'll want to start by deciding on your part and sectioning your hair accordingly. Most people like to part their hair down the center for two French braids, but I like to keep my side part intact. Once you've sectioned your hair for each braid, work one side at a time. Start at the top of your head, next to the parting, and grab a small section of hair. The only difference between French braiding and regular braiding is that now every time you go through a section in the middle, you add a bit more hair. Once you've started with your usual braid, continue to hold all three pieces, but grab a small section of the front of your hair to add it to the correct piece, then cross it in the middle. Next, grab a small section of hair towards the back of your head to add the left side and cross it in the center.# Video | Braids Selber Machen Was Brauche Ich
- Hair Braiding
- Box Braids
- Braids Diy
- Box Braids Extensions Tutorial
- Jumbo Braids Diy
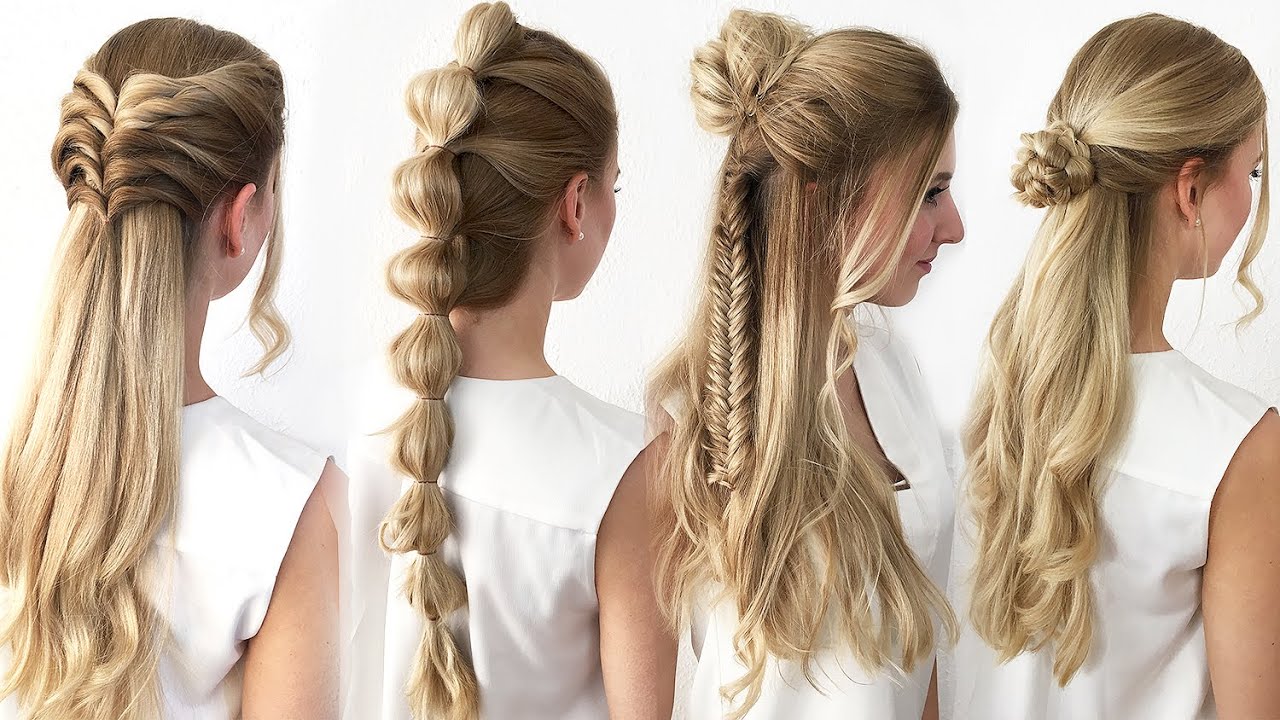
# Images | Braids Selber Machen Was Brauche Ich - How To Braid In Hair Extensions
Braids Diy - Dutch Braids
 Save
Save
Box Braids - A step-by-step guide to French-braiding your own hair
 Save
Save